Banjo the Amigurumi Woodland Owl

I did promise you a tutorial!
Would you like to make one? It's not that difficult!
This little owl is made in a few pieces: body, head, wings, tail and feet. All quick and easy!
Note for the body of my owl I used a variegated cream and brown cotton yarn which gave a nice mottled finish. But you can use a soft beige, or cream or whatever you wish.
Let's get started...
Amigurumi Tips:
All amigurumi is crocheted in rounds of continuous spirals without joining to beginning of round unless stated otherwise. If the patterns states to stop working in spirals, finish rows, and chain up according to the pattern.
Always use a stitch marker when working in the spirals or you'll lose your place!
All thread ends can be hidden in the body of your Ami.
Never talk about fight club.
Tools of the Trade:
- I have used Patons 4 ply cottons in a range of cream to browny colours or whatever takes your fancy for his head, body and tail.
- Cream cotton for the circle parts of the eyes and brown or black 4ply cotton for the eye details
- Soft orange 4 ply cotton for feet and beak.
- 2.5mm crochet hook (you can use a 2mm hook for a slightly smaller owl if you wish)
- Scissors
- Darning Needle
- Polyfill Toy Stuffing
Abbreviations: (US crochet terms used)
- Beg: beginning
- Ch: chain
- Dc: double crochet
- FO: Fasten off
- Hdc: Half double crochet
- Inv dec: invisible decrease (for my invisible decrease tutorial video click here)
- MR: Magic ring (for my magic ring tutorial video click here)
- Sc: single crochet
- Sl st: slip stitch
- St: stitch
- Tr: treble
First let's start with the body:
Round 1: Work 6sc into MR
 |
| Round 1 done |
R2: 2sc in each sc of the previous round [12]
 |
| Round 2 done! |
R3: (2sc), sc in next st [18]
 |
| Round 3 done! |
R4: Sc in each st of the previous round [18]
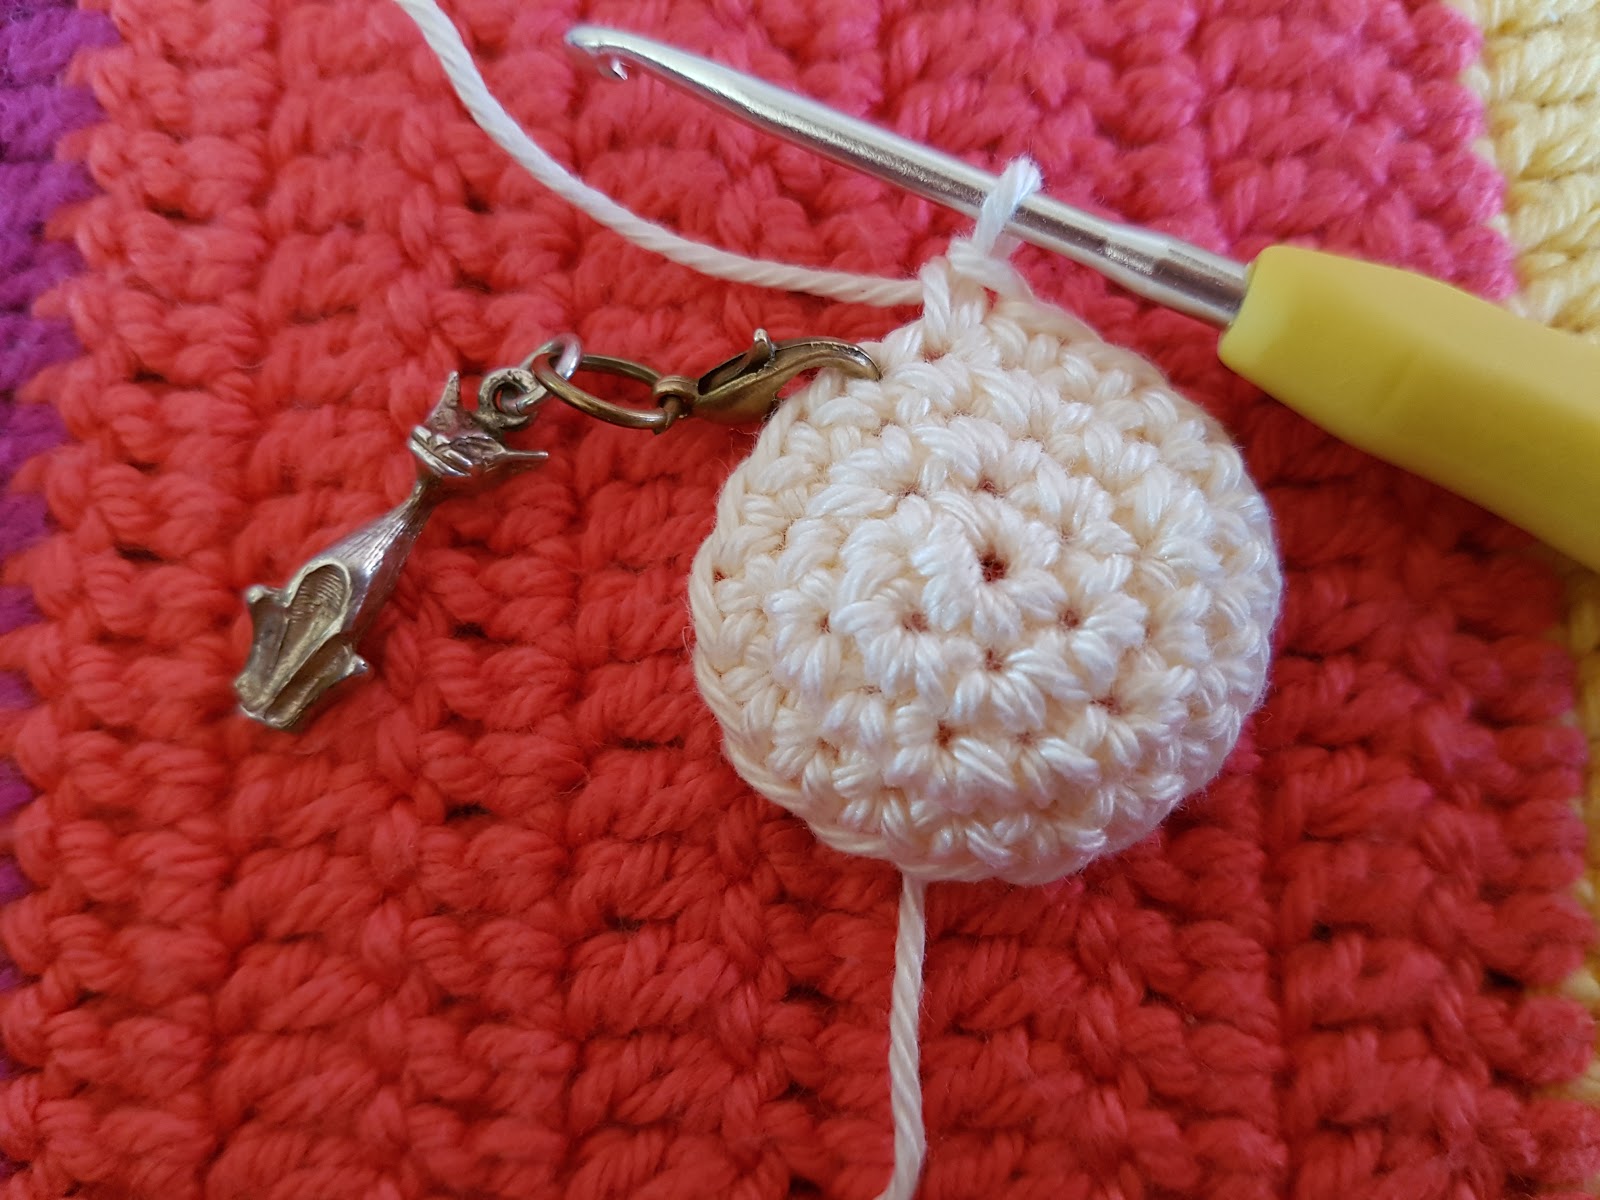
R5: (2sc), sc in each of next 2 st [24]
 |
| Round 5 done! |
R6 & 7: Sc in each st of the previous round [24]
R8: Inv dec, sc in each of the next 10 st, inv dec, sc in each of the next 10 st [22]
R9- 14: Sc in each st of the previous round. At the end of Round 14, FO.
 |
| The finished body. |

Now let's make the head!
Ch 23, join with a sl st to the 1st st to form a loop.
Continue working in the round.
Round 1-7: Sc in each st around
 |
| The head after Round 2 |
 |
| The head with Rounds 1-7 finished! |
R8: Sc, hdc, in next st (dc, tr), in next st (tr, dc), hdc, sc, sl st across next 6 st, sc, hdc, in next st (dc, tr), in next st (tr, dc), hdc, sc, sl st across remaining 5 st.
FO leaving a 4-5 inch tail length of yarn. then use this to stitch from the tip of one ear to the other to close.
 |
| The shaping of one ear in Round 8 |
 |
| Round 8 finished after the shaping of the 2nd ear. |
 |
| Ready to stitch the top of the head together? |
 |
| Folding the head in half from the middle tip of one ear to the other, use the left over tail end of yarn to slip stitch across evenly. |

So your head should now look like this:

To sew the head to the body, turn the body inside out.
Then without turning the head inside out, slide the head into the body so the ears are pointing down towards the base of the body.
Stitch the neck edge of the head to the neck edge of the body, leaving a 2 cm gap at the back.
Through this gap, turn the owl out the right way. Now stuff polyfill toy stuffing in through the gap until comfortably full, then sew the gap closed.

Round 1: Work 4 sc in MR [4]
 |
| Round 1 |
R2: 2sc in each st [8]
 |
| Round 2 |
R3: Work in pattern: 2sc, sc [12]
R4: 2sc, sc, sc [16]
 |
| Round 4 |
 |
| Round 5 |
Now let's make Banjos Tail!
Row 1: Ch 5, then starting in 2nd ch from the hook work 2sc in that ch, sc in each of the next 2 ch, 2sc in last Ch. Ch 1 & turn. [6]


Row 3: In first sc (hdc, dc, hdc), sl st into next sc of previous row, in next st (hdc, dc, hdc), sl st into next sc of previous row, in last st (hdc, dc, hdc), the sl st into the side of the tail to finish. FO, leaving a length of yarn 5 inches long. Use this tail length to sew the tail to the body. (Position photo to follow a little further down!).


Round 1: 4sc in MR [4]
 |
| Round 1 |
Cut a length of brown or black 4 ply cotton yarn and embroider sleepy eyes as shown below.


Then sew onto Banjos head! Now he's starting to look cute!

Beaky Schmeaky
Cut a length of soft orange yarn and embroider on Banjos beak like below. I'm a crap embroiderer so am probably not the best to give embroidery advice, but I stitched in 6 long lines in the shape of a triangle for the main beaky part, then 3 short lines across the top.

Those dancing feet! (Make 2)
In a 4 ply cotton yarn, simply start by making a Chain 4...

Row 1: Starting from 2nd ch from the hook, sc in each of the 3 stitches. Ch3, turn. [3]
 |
| Row 1 |

Now you can use the photo below as a guide to sew on Banjos feet and tail. I positioned them between rounds 3 & 4 from his bum.

Now if you haven't done it already, you can sew on the wings.
To give them a slightly open, resting appearance, I have the wing tip pointing towards his belly button and stitch from the middle top of his shoulder, then stitch around the back and finish at the base of the wing tip only. I don't stitch the wing to him all the way around on his belly.


And you're finished! Well done! Did you make your own little Banjo the Woodland Owl? Did you make him in colours like mine or go bright and wild? Show me! Tag me on Instagram (@red.haired.amazona.crochets) or on my Facie Page. I'd love to see your makes!!
Just the sweetest!! Thank you for the pattern and tutorial!!!! Darlene P.
ReplyDeleteLove the little bird (owl) and the other birds you made. I made Pearly the Hummingbird, but it didn't turn out like yours, I still like it.
ReplyDeleteI love your little owl! That is very nice of you to write up the pattern and share it. ((hugs)), Teresa :-)
ReplyDeleteOh, I love it, I need to make a few of these for my daughter, she's going to love them! Thank you for sharing this tutorial at The Really Crafty Link party this week. Pinned!
ReplyDeleteYou are so talented! These are so cute ♥
ReplyDeletesummerdaisycottage.blogspot.com
What a sweet and lovely owl. Thank you for sharing the pattern!
ReplyDeleteGreat tutorial - the pics make everything so clear! Cute!
ReplyDelete