Matahari Mandala- A Free Tutorial

Whenever I don't feel like working on a current big project, and want something small and fast, I've developed a habit of making mandalas.
Or doilies.
Or Mandoilies.
I can't decide what to call them!
I just grab one or more balls of cotton yarn, a hook and start crocheting.
The trick is to increase evenly so you don't get the wibbly- wobblys, just a nice flat circle.
Here is one I whipped up a few weeks ago from a delicious variegated cotton yarn called Moda Vera Mornington 8ply. It's a mercerized cotton, so a bit shinier and slimmer than the normal 8ply cotton.

And the colours are psychedelic!! I've named it 'Matahari' which is the Indonesian/ Malay word for 'sun'. When I stayed on the Indonesian island of Lombok a long time ago it was common for the locals to hold a newspaper over their head on a hot, sunny day and remark, "Astaga! Matahari itu panas sekali!" (Gee Willickers! The sun is very hot!)
I then went CRAZY and added little beads. I am still using it as a doily, but it's reminiscent of the old fashioned milk jug covers, don't ya think?
Would you like a tutorial? Woo Hoo!
As with many of my patterns, if you would like a printable PDF, you can purchase a digital download from my Etsy, or Ravelry Stores for the super low price of US$1. Admin costs baby!!
For this tutorial I have used normal 8 ply cotton with a different colour for each row so it's easy to see the stitches in each row.
What do ya need?
- Yarn: 8ply cotton yarn. I have used the following colours for the tutorial:
 Colour B: light pink
Colour C: apricot
Colour D: dark pink
Colour E: Ecru/ cream
Colour F: Orange
BUT YOU CAN JUST USE ONE BALL OF YARN LIKE THE FIRST MANDALA ABOVE IN ANY YARN YOU LIKE.
- If you're using a normal 8 ply cotton, I recommend a 3.5mm hook. For mercerized 8ply cotton, I used a 3mm.
- 12 pretty beads
- thread for sewing on the beads
- darning needle.

Let's get started!
Round 1: Starting with Colour A, crochet a magic ring, chain 3 (counts as first dc). Then 11 x dc in MR. Join with a ss to top of beg Ch3. FO. [12dc]
 |
| Round 1 |
Round 2: Join Colour B into the top of any dc. Ch 3 (counts as first dc). Then in the same st 1dc, then 2dc in each st around. Join with a ss to top of beg Ch3. FO. [24dc]
 |
| Round 2 |
Round 3: Join Colour C in any space between 2 dc. Ch 3 (counts as first dc). In the same space 1dc, Ch1. Sk next 2dc, *(2dc in same sp, Ch1, sk next 2dc). Repeat from * 11 times. Join with a ss to top of beg Ch3. FO. [24dc, 12 x ch1 sp]
 |
| Round 3 |
Round 4: Join Colour D in any Ch1 space. Ch 4 (counts as first dc & Ch1). In the same space 1dc, Ch1. Working only in each Ch1 in the round *(Dc, ch1, dc, Ch1). Repeat from * 11 times. Join with a ss to the 3rd ch of beg Ch4. FO. [24dc, 24 x Ch1 sp]
 |
| Round 4 |
Round 5: Join Colour A in a 'V' ch1 space. Ch3 (counts as first dc). In the same space 1dc, dc in top of next dc, dc in next Ch1 sp, dc in top of next dc. *( 2dc in the Ch1 'V', dc in top of next dc, dc in ch1 sp, dc in top of next dc). Repeat from * 11 times. Join with a ss to top of beg Ch3. FO. [60 dc]

Round 6: Join Colour B in between any 2 dc. Ch 6 (the 1st ch counts as a sc), sk 5dc, then sc between the 5th dc and the next dc. *(Ch 5, sk 5dc, sc in between the 5th dc and the next dc). Repeat from * 11 times. Join with a ss to 1st ch in the initial 6ch. FO. [12 sc, 60ch]
 |
| Round 6 close up |
 |
| Round 6 not close up |
Round 7: Join Colour E in any Ch 5 space. Ch 1 (does not count as a stitch), sc x 6 in the Ch5 space. Sk sc of previous row. *(Sc x 6 in next Ch 5 space, sk next sc of previous row.) Repeat from * 11 times. Join with a ss to 1st sc. FO. [72sc]
 |
| Round 7 |
Round 8: Join Colour F to the 3rd sc of the 6sc's that you crocheted over the Ch 5 spaces. Ch 1(does not count as a stitch). Sc in same st, Ch 6, sk 5 st, *(sc in 6th st, Ch 6, sk 5 st). Repeat from * 11 times. Join with a ss to the 1st sc. FO. [72 ch, 12 sc]
 |
| Round 8 |
Round 9: Join Colour C in any Ch 6 space. Ch 1 (does not count as a stitch). Sc x 7 in the Ch 6 space, *( sc in the sc of the previous row, sc x 7 in the Ch 6 sp). Repeat from * 11 more times. Join with a ss to the 1st sc. FO. [96 sc]

Round 10: Join Colour D to any sc stitch which is above a sc stitch from Round 8 (see photo below for clarification). Ch 1 (does not count as a stitch). Starting from that first st: *(sc, sc, hdc, dc, tr, Ch3, then ss in the 1st ch, tr, dc, hdc). Repeat from * 12 times. Join with a ss to the 1st sc. FO. [96st, 12 x 3ch 'peaks']
 |
| Round 10 |
Round 11: Join Colour E to the Ch3 'peak' bit of any triangle from Round 10. Ch 1(does not count as a stitch). Sc in same st, Ch 10, sk to the next Ch3 'peak', *(sc in Ch3 'peak', Ch 10, sk to the next Ch3 'p). Repeat from * 11 times. Join with a ss to the 1st sc. FO. [120 ch, 12 sc]
 |
| Round 11 |
Round 13: Join Colour A to any single crochet stitch which is right above a Ch3 'peak' from Round 10. Ch3 (counts as first dc), then dc in the same stitch. In each stitch across Dc x 11, *(2dc in next stitch, 11 x dc). Repeat from * 11 times. Join with a ss to the top of beg Ch 3. FO. [156 dc]
 |
| Round 13 |
Round 14: In between the last dc of Round 12 and the beg Ch3 on R12, join Colour D, Ch 3, then dc in same space. Then *(sk 2 dc, 2 x dc in between next 2 dc). Repeat for the rest of the round. Join with a sl st to beginning Ch 3. FO. [156 dc]


Round 15: With this last round we are simply going to slip stitch around.
To start insert hook into any dc, yarn over, pull through to the front, insert hook into next dc, pull through to the front, then slip through the loop leaving one loop on the hook. Continue to slip stitch all the way around in each dc of the previous round.
Follow the photo instructions below.
 |
| Insert hook into any dc... |
 |
| Pull through a loop... |
 |
| Insert hook into next dc, yarn over and pull through the loop... |
 |
| Then slip through the previous loop on the hook. |
 |
| This is what it looks like after 6 stitches. |
 |
| This is what those 6 slip stitches look like from the back of the work. |
 |
| Round 15 finished. |
If you didn't sew in your thread ends as you finished each row, do so now.
And if you want to add beads, grab needle and thread and sew them on.
I used 12 beads and matched them roughly in line with the peaks of those rays from Round 10.
The next step is to block your work.

Your piece may look a little wibbly- wobbly, but this is easily fixed with a light blocking. I simply pin out the mandala on a piece of foam, then lightly spray with water and leave to dry.
This is sufficient as I use my mandalas ALOT! Especially on the dining table where they may get dirty. So they get washed frequently. And if you use spray starch, you will need to restarch after every wash.
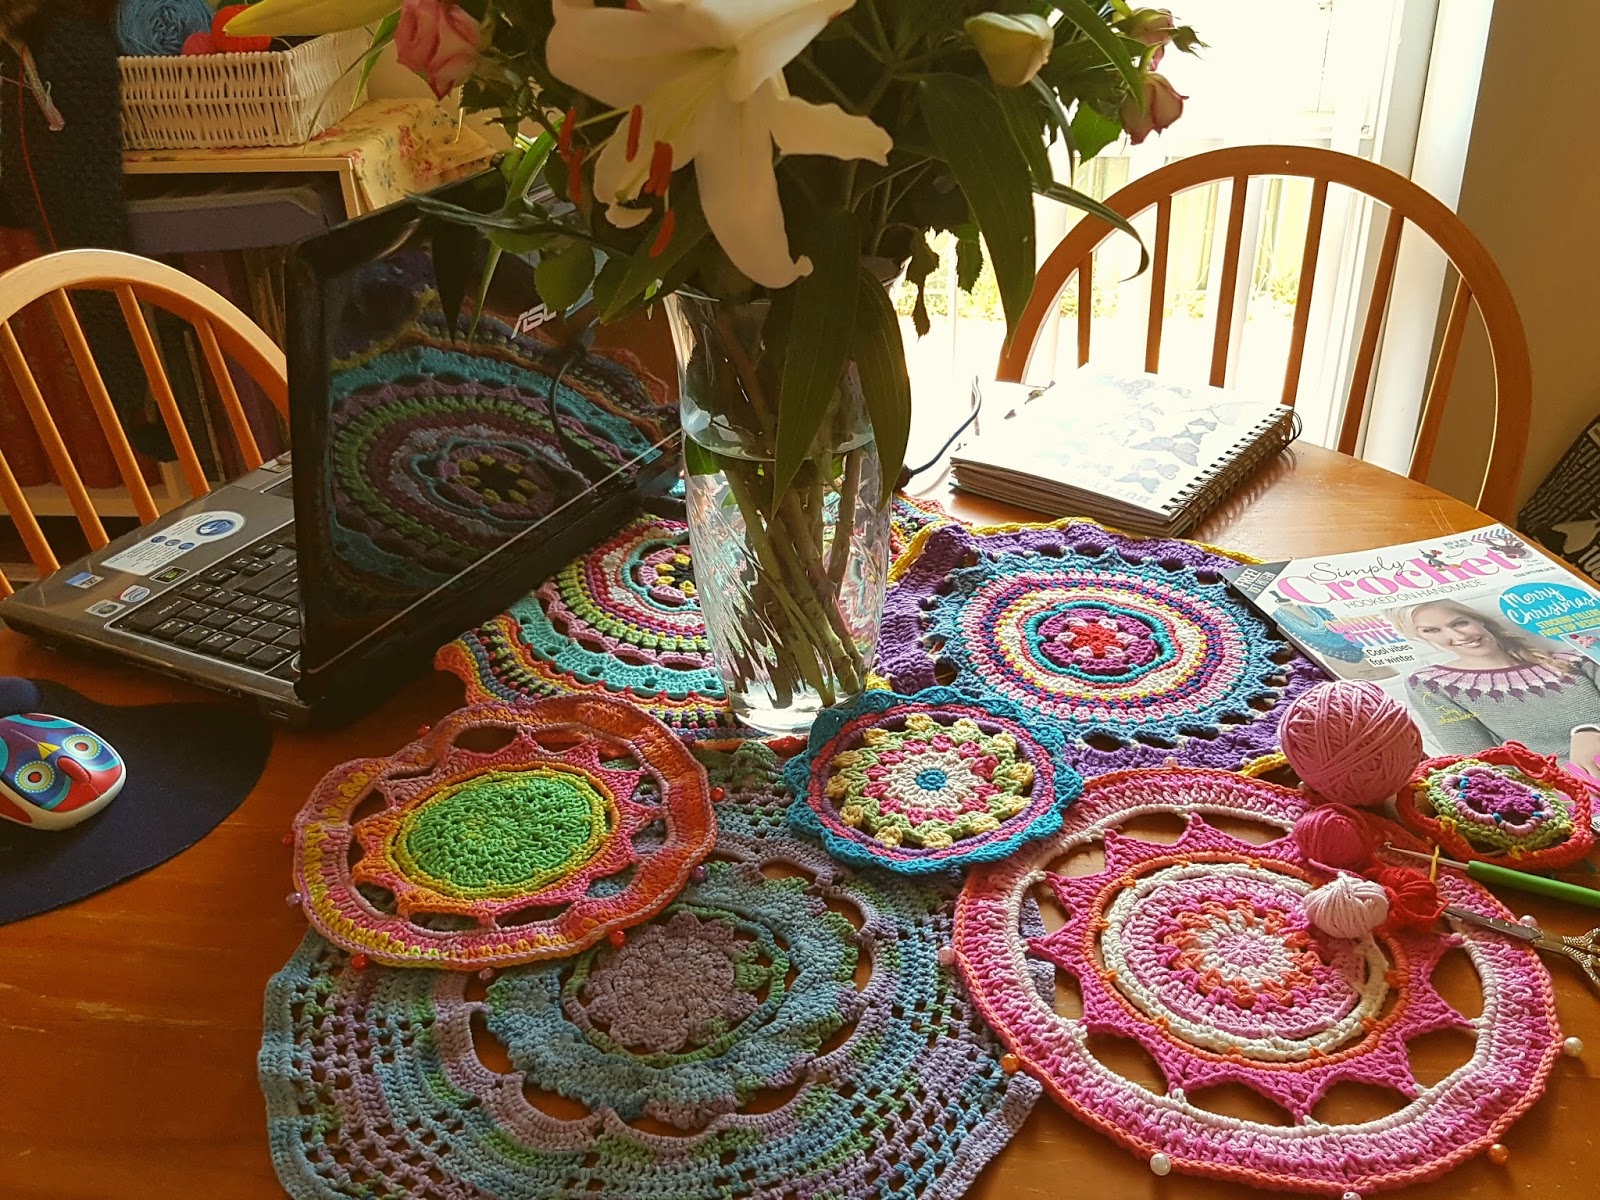
Here's a classic example of how I usually have an assortment of mandalas on my dining table.


After I took this photo, Violet pee'd AND crapped on one of my cotton mandalas. I was able to pop it in a laundry bag and into the washing machine on a gentle cycle. The mandala, not the guinea pig. Because we don't put our guinea pigs in the washing machine, do we boys & girls?
Did you make one? Good for you! I'd love to see it! Post your makes to my Spacey Facey page, or tag me on Instabrag!


xox
Louise
The Red Haired Amazona
Beautiful! I still haven't made one yet! Definitely think I'd need more bright coloured cottons to make a Mandala!
ReplyDeleteWhat about all those balls of yarnart begonia? They would be perfect!
DeleteGREAT JOB! - I've always had trouble with doing circles... Probably why I usually stick to squares. Remind me to show you some time on how to make a nice "squared" corner...
ReplyDeleteBTW, I'm also liking your nice Cotton. Shiny! :-D
And, VIOLET is ADORABLE!! - Although, I'm not sure if I'd be so "calm" about the peeing on my yarn bit... ;-[ Hope none of it landed on your laptop..?
Speaking of bladder-challenged Rodent-esque creatures... I had a "first" the other day... Was having breakfast and saw "CHUCKY"-Squirrel out on the porch, picking through the leftover bird food as usual, when he [or I'm beginning to suspect "she"] began to settle into a wiremesh-tray sitting out there... "Normal" behavior, sorta, until I realized that he was squatting more than just sitting and then, started *pissing*!?! wt*?? Did he think the tray was a litter box or what? eww... However, the part that probably annoyed me the most, was that NONE of the piss landed on any of the surrounding SNOW!! [I'll try almost anything to melt that stuff!]
So. You speak Malay..? COOL! -- They don't by chance have a word for "snow", do they?
Anyhoo, all that COLOUR has made my day! Going snowBLIND here!
;-}
XX
Ha! You crack me up! Chucky was probably claiming his/ her food territory! Not that any sane creature would want to eat Wee Wee Food! Maybe he didn't want to pee in the snow after hearing Frank Zappas wise words about yellow snow?
DeleteBeautiful mandala and lovely colors:) Thanks for sharing!
ReplyDeleteStopping by from HOHD link party.
Beautiful crochet, love your colors too! seen you on HOHD
ReplyDeleteFO means...flip over??
ReplyDeleteHi there, sorry for the delayed reply. FO means fasten off.
Delete