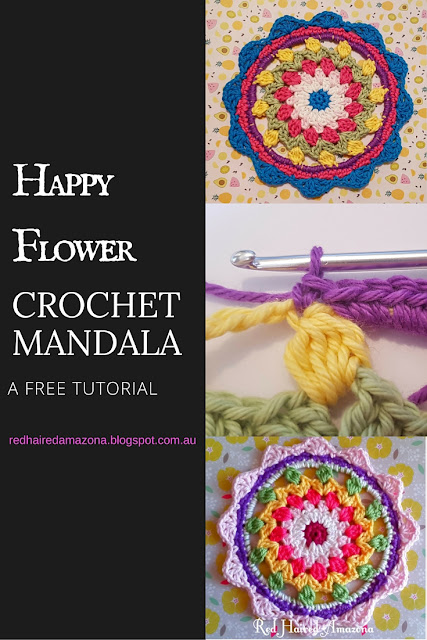
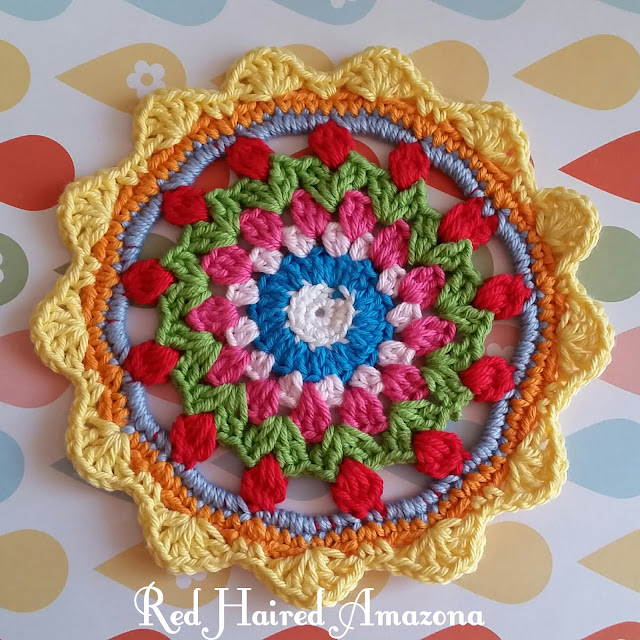
Happy Flower Crochet Mandala
Why Happy Flowers? Because I've kind of convinced myself there are tulipy type flowers in rounds 6-7!
And they make me happy!
Would you like to make yourself some of these super easy peasy fast mandala/ doily thingos? Then let's get cracking!!
What do you need??
3.5mm crochet hook
A darning needle
Scissors
Yarn: Any brand of 8ply Cotton or
Cotton Blend. I used Patons 8 ply Cotton Blend.
Colour A: Teal
Colour B: White
Colour C: Soft Pink
Colour D: Mid Pink
Colour E: Soft Green
Colour F: Yellow
Colour G: Purple
Special Stitches:
Beginning Popcorn:
Ch 3, yarn over, insert hook into the Ch2 space, YO, pull up the loop, YO, pull through 2 loops. There will still be 2 loops left on the hook. YO, insert yarn into the same Ch2 sp, YO, pull up a loop, YO, pull through 2 loops. There will now be 3 loops left on the hook. YO, insert hook into the same Ch2 sp, YO, pull up a loop, YO, pull through 2 loops. There will be 4 loops left on the hook. YO, pull through all 4 remaining loops.
4DC Popcorn:
YO, insert hook into next Ch2 sp, YO, pull up the loop, YO, pull through 2 loops. There will still be 2 loops left on the hook. YO, insert yarn into the same Ch2 sp, YO, pull up a loop, YO, pull through 2 loops. There will now be 3 loops left on the hook. YO, insert hook into the same Ch2 sp, YO, pull up a loop, YO, pull through 2 loops. There will be 4 loops left on the hook. YO, insert hook into same sp, YO, pull up a loop, YO pull through 2 loops. There will be 5 loops left on the hook. YO, pull through all 5 remaining loops.
Abbreviations
Beg: beginning
BLO: back loops only
Ch: chain
Dc: Double Crochet
Hdc: half double crochet
MR: Magic ring
Sc: single crochet
Sk: skip
Sl st: slip stitch
St: stitch
Let's get started!!
Super Dooper Tip: As you fasten off each colour, sew in your ends. Saves the big stitch up later on!
Round 1: Starting with Colour A, work 6sc into MR [6]
 |
| Round 1 |
 |
| Round 2 |
R3: Ch 3 (counts as dc), dc in same st, then *(2dc in each st ) Repeat from *. Join with a sl st to top of beg Ch 3. Fasten off and join Colour C in between the 2 groups of 2dc. [24]
 |
| Round 3 |
R4: Ch2 (counts as hdc), hdc in same st, *Ch 1, sk next 2dc, 2hdc in same sp). Repeat from * to the end. Join with sl st to top of beg Ch2. Fasten off and join Colour D in a Ch1 sp. [24hdc & 12ch]
 |
| Round 4 Close up |
 |
| Round 4 |
R5: Ch3 (counts as dc), 2dc in same sp, *(Ch1, 3dc in next Ch 1 sp) Repeat from * to the end. Join with a sl st to top of beg Ch3 and fasten off. Join colour E in a Ch1 sp. [36dc & 12ch]
 |
| Round 5 |
 |
| Round 6 close up |
 |
| Round 6 |
R7: Work Beginning Popcorn (see Special Stitches above), Ch5, then *(4DC Popcorn, Ch 5) Repeat from * to the end. Join with sl st in top of beg Ch3. Fasten off and Join Colour G. [12 Popcorns & 60ch]
***Tip: take care not to work your ch 5 too tightly or it will warp the work!!***
 |
| Round 7 |
R8: Ch1, then 6Sc in each Ch5 sp, 1sc in top of each popcorn. Sl st to beg ch. Fasten off and join Colour C into sc above a popcorn st. [84sc]
 |
| Round 8 Close up |
 |
| Round 8 |
R9: Ch1, 2sc in same st, *(sc in each of the next 6sc, 2sc in same sc above the popcorn st of R7) Repeat from *. Join with a sl st to beg st, fasten off. Join Colour A. [96sc]
 |
| Round 9 |
R10: Ch1, sc in same st. Sk 3 st, Work shells as follows: *(dc, Ch1,dc, Ch1, dc, Ch1, dc, Ch1, dc, sk 3 st, sc, sk 3 st) Repeat from * around to the end. Fasten off. If you haven't sewn in your ends as you went along, do so now. [12 shells]
 |
| Round 10 Close up |
Block and you're done!


Those are really bright and pretty.. how nice of you to do a tutorial for your readers. I'm at the beach now with my 3 girls.. having fun. Have a super weekend. ((hugs)), Teresa :-)
ReplyDeleteBrilliant tutorial, when I have got past the chain will love to have a go
ReplyDeleteGorgeous and such a detailed tutorial, thanks for sharing it.
ReplyDeleteGreat pics! One could do THIS *just* by looking at them. :-D
ReplyDeleteMeanwhile, just to let you know, we've got a robin's nest just outside our kitchen window [about 4-ft away, behind some annoying branches in the way!] that's managed to survive several COOL, WINDY days! And, a CHIPMUNK [haven't seen one of those in ages!] has also taken residence on the property... Spotted him this afternoon on some of the rocks in front garden looking rather DISNEY-esque! He must've heard about Mom's "gourmet"-bird feeders on the porch from the regular SQUIRRELLY crowd!
;-}
Thanks for the tutorial. I have booked marked it and will give it a go. I will be very proud if I can make one.
ReplyDeleteI love the way you have included so many photographs - it makes the project feel achievable!! Love it:)
ReplyDeleteWhat a perfect tutorial, I love the step by step guide #TheRealCraftyLinkParty
ReplyDeleteThey are wonderful, and I love the color combinations. Thank you so much for sharing this tutorial at The Really Crafty Link Party this week! Pinned!
ReplyDeleteWhere can I get a free download of this pretty pattern? It's a very prettydesign
ReplyDeleteThank you! I don't have a pdf for download of this pattern. Only the tutorial here.
DeleteHow can someone make it bigger
ReplyDeleteHi there, I'm not sure how much bigger you'd like it to be, but you could try using a thicker yarn and larger hook size :)
DeleteMy expected pattern! Thanks a lot. Happy Flower Crochet Mandala- Happy happy day!!!
ReplyDelete