Twinkle Star Hand Mitts
A few years ago I crocheted myself a pair of these snug hand mitts designed by Lucy from Attic 24.
 |
| As you can tell, they've had a lot of use! |
It was a super easy pattern and there are LOADS of variations out there in the interwebs.
Then recently a hole appeared.
I was totes devo* (as the youth of today say).
*totally devastated, inconsolable, grief stricken, my heart had broken into a million pieces
I was about to make another pair the same. I loved them. They were warm, but left my fingers free to handle keys, type sms, pick my nose and all the other things you need fingers for.
Yes, I do complain about the cold but it doesn't get super dooper freezing down here in Melbourne. So I don't need to hide my little typing, handling, picking fingers in chunky gloves.
And you know me. I get a little creative, experimental, sometimes psycho. But this time just the first two.
So here just for you is yet another scrumdiddiliumptious FREE tutorial for my latest pair of mitts!
Would you like to make some? Awesome!
So let's get started!
For this pair, I have chosen Peacock inspired colours of purples, blues and teals, with a splash of pink and silver. But you can choose to use any colour combo you like such as the pinky, blue ones in the photo above.
What will you need?
* a combination of 8ply cotton yarns in the colours listed in the chart below, or your own choices. The silver thread will probably be acrylic.
|
Colour A
|
Purple
|
|
Colour B
|
Hot Pink
|
|
Colour C
|
Mid Pink
|
|
Colour D
|
Silver
|
|
Colour E
|
Aqua
|
|
Colour F
|
Teal
|
|
Colour G
|
Black
|
|
Colour H
|
Navy Blue
|
* a 4mm crochet hook
* a 3.5mm crochet hook
* scissors
* a darning needle
Stitch Abbreviations
(U.S. Crochet terms are used)
ch
|
Chain
|
dc
|
Double crochet
|
fo
|
Finish off
|
hdc
|
Half double crochet
|
sc
| |
sk
| |
Stitch |
For this pattern, we will be working strictly right to left. At the end of each row, after you finish off a colour, DO NOT TURN!!! You join the new colour back at the beginning of the previous row.
This creates a definite 'front' and 'back' side to your fabric.
This applies for all rows EXCEPT THE STAR STITCH ROWS. (Sorry, didn't mean to yell in All Caps!)
For the Star Stitch rows only, we will turn and work on the wrong side of the fabric.
Let's get started!
Generally I create a starting chain in groups of 6 + 3. So for my mitt below, I crocheted a starting chain of 39 {6 x 6 + 3}.
To make one a little wider, you could crochet a starting chain of 6 x 7 + 3 = 45.
To make one a little narrower, you could crochet a starting chain of 6 x 5 + 3 = 33
This simply ensures the shell rows and star stitch rows all work out nicely. If you wish to deviate from this stitch count, then adjust your pattern accordingly.
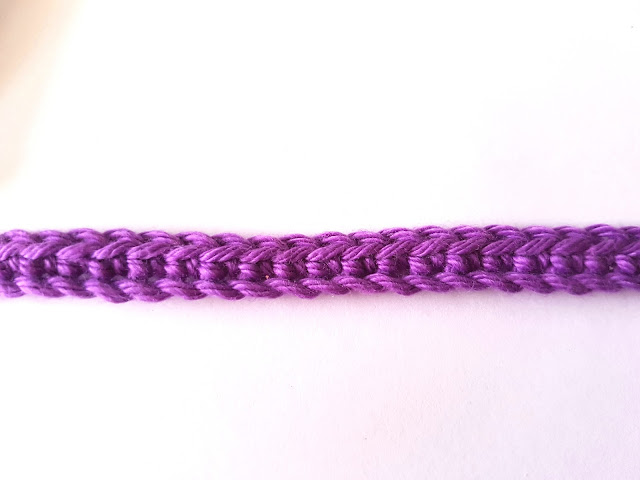
Starting Chain: Take your 4mm hook, and crochet a starting chain of 39 stitches.
Do not finish off. SWITCH TO THE 3.5mm HOOK!
 |
| The Starting Chain |
Row 1: Starting from the 3rd ch from the hook, sc in each stitch across. FO. [37sc]
 |
| Row 1 |
REMEMBER DO NOT TURN! START BACK AT THE BEGINNING OF ROW 1!!
Row 2: Join Colour B. Ch 1, sc in same st, *(sk 2 st, 5dc in next st, sk 2 st, sc in next st).
Repeat from * to the end. FO. [6 shells, 7 sc = 37st]
 |
| Row 2 |
Row 3: Join Colour C. Ch 3 (counts as 1st dc), then 2 dc in base of beg ch3. Sk 2 st, sc in 3rd dc of Row 2 Shell (middle dc of shell), *(sk 2 st, 5dc in sc of previous row, sk 2 st, sc in next st which is the middle st of R2 shell).
Repeat from * 6 times, then sk 2 st, 3dc in last st. FO. [5 shells, 2 x 1/2 shells, 6sc = 37 st]
 |
| Row 3 |
Repeat from * to the end. Sc in last st. FO. [19sc, 18ch = 37st]
 |
| Row 4 |
 |
| Row 5 |
 |
| Beginning of Row 6 |
 |
| Row 6 |
 |
| Deciding what colours go next... |
Row 7: Join Colour D. Repeat Row 4. FO.
 |
| Row 7 |
Repeat from * to the end, finishing with a Lhdc. FO. [19 lhdc, 18sc = 37st]
 |
| Row 8: Close up of the long half double crochet stitch placed between the posts of the single crochet from Row 6 |
 |
| Tah-dah! Not so hard is it! |
 |
| And then the single crochet stitch in the next sc... |
 |
| Row 9 |
Row 10: Join Colour F. Repeat Row 3. FO.
 |
| Row 10 |
*******The Star Stitch Rows*******
Rightio! Do you know how to crochet the Star Stitch? if you don't, you will shortly.
Remember how we have been working on one side of the fabric only? For these next star stitch rows, we will be turning and working the half double crochet rows on the back side of the fabric.
After you finished Row 10, join Colour 'A' AT THE END OF ROW 10, then turn to begin Row 11.
Row 11: Ch2 (counts as 1st hdc), then hdc in each st across. Turn. [37hdc]
 |
| Row 11: the 1st row of the star stitch |
Row 12:
Step 1: Chain 3
 |
| Row 12 Step 1: let's take this a little at a time.... |
Step 2: Insert hook into the 2nd chain from the hook...
 |
| Row 12: Step 2 |
Step 3: and pull up a loop. You should now have 2 loops on the hook.
 |
| Row 12: Step 3 |
 |
| Row 12: Step 4 |
 |
| Row 12: Step 5 |
 |
| Row 12: Step 6 |
 |
| Row 12: Step 7. |
 |
| Row 12: Step 8. Woah! Look at all those loops! |
 |
| Row 12: Half a star! |
 |
| Row 12: See that little circle? That's the 'eye' of the star! |
 |
| Row 12: stick your hook right in his eye!!! |
Step 12: and pull up a loop. You should now have 2 loops on the hook.
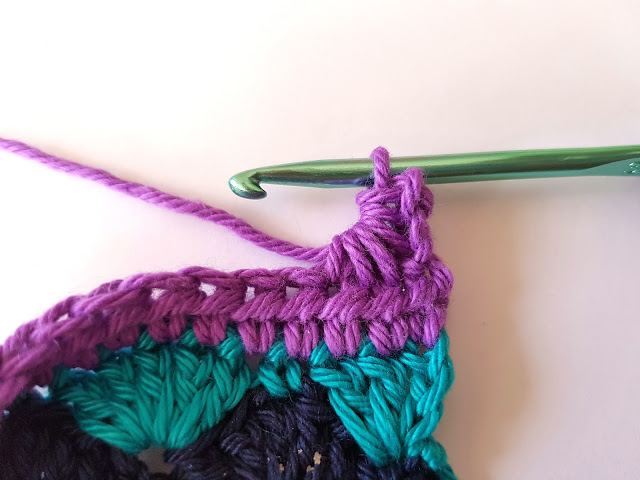
Now look carefully for the spike! See that last spike from the star you just finished? Look at the photo below...
 |
| Row 12: See that big arrow? Pointing at the 'spike'? That's the spike we mean! |
Step 13: Insert the hook into that last spike...
 |
| Row 12: Inserting the hook... |
 |
| Row 12: You did it! Well, that small bit anyway... |
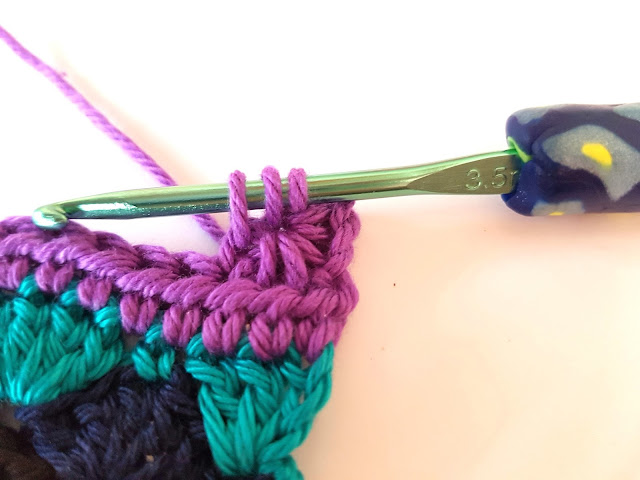
You will now have 4 loops on the hook.
 |
| Row 12: 4 loops on the hook |
 |
| Row 12: 5 loops |
Step 17: Insert hook into next stitch and pull up a loop. You will now have 6 loops on the hook.
Step 18: Yarn over, and pull through all 6 loops leaving 1 loop left on the hook.
Step 19: Chain 1. This will make the 'eye' of the star.
Repeat Steps 11-19 for each little star all the way to the end.
For the very last star in the row, make sure you use the very last stitches including the turning chain from the previous row, and you should end up with 18 little half stars.
Remember we will be turning and working back along for the next row to finish the stars, so after the last star: turn!
Row 13: Ch2 (counts as 1st hdc), hdc in same st, then crochet 2 hdc in each 'eye' of the star of the previous row all the way to the end, finishing with 1 hdc in the last stitch. [37st]
 |
| Row 13: Working along the back side of the fabric, See how there's 2 hdcs in each eye? |
Row 14: Repeat Row 12. [18 stars]
Row 15: Repeat Row 13 [37hdc]
Row 16: Repeat Row 12 [18 stars]
Row 17: Repeat Row 13 [37 hdc]
Row 18: Repeat Row 12 [18 stars]
Row 19: Repeat Row 13. FO. You will be finishing on the 'back' side of the work. Now turn over and we will continue to work on the 'front' side only from right to left.
 |
| Close up of the finished star stitch rows including the hdc rows. |
 |
| Once you've finished Row 19, this is what the 'front side' of the work will look like. |
 |
| After you've finished Row 19, this is what the 'back side' of the work looks like. A bit weird and lumpy. Don't worry, it will all be hidden when we've finished. |
 |
| Row 20. Just dcs. Nothing crazy! |
Repeat from * to the end, then work just 2dc in last st. FO [37dc]
 |
| Row 21 is just a granny stripe row |
 |
| Row 22 |
Row 23: Join Colour C. Repeat Row 4. FO. [19sc, 18ch = 37st]
Row 24: Join Colour E. Repeat Row 5. FO. [20 sc, 17ch = 37st]
LAST ROW!!!!!
Row 25: Join Colour A. Repeat Row 4. FO. [ 19sc, 18ch = 37st]
 |
| Tah- dah! |
I did as the star stitch rows make things go a little wonky. I just pinned it out and gave it a light spritz with a water spray bottle.
Once you're ready to sew them together, fold in half with front or 'right' sides together.
Then using either the main colour cotton, carefully hand stitch along where indicated below, leaving a gap for your thumb.
I usually leave the gap from the top of the star stitch rows to about 2-2.5 rows down. Then place a stitch marker to indicate where I'm going to start stitching again.
And that's one done! Now make another!
The cotton is washable and lightweight but cosy.


Wow.. I'm very impressed with that pattern and the colors "send me".. swoon.. I might have to try that someday. I'm in the beginning of making a baby blanket for my son's work friend's baby to be. Thanks for all the hard work you've done to write up that pattern! Bravo! ((hugs)), Teresa :-)
ReplyDeleteWow, they look lovely & just might try some ready for next winter. Who says it doesn't get cold here in Victoria. We are on the eastern side of Melbourne (country) & we've had some amazing frosts this year. Anyway, thank you for the tutorial & I've lots of leftover yarn so will have a go.
ReplyDeleteTake care.
Wow, they look lovely & just might try some ready for next winter. Who says it doesn't get cold here in Victoria. We are on the eastern side of Melbourne (country) & we've had some amazing frosts this year. Anyway, thank you for the tutorial & I've lots of leftover yarn so will have a go.
ReplyDeleteTake care.
Hi, just found you whilst bloghopping! Love your mitts, thankyou for sharing the pattern :)
ReplyDeleteJillxo
Hi, just found you whilst bloghopping! Love your mitts, thankyou for sharing the pattern :)
ReplyDeleteJillxo
Gorgeous gorgeous gorgeous 😍
ReplyDeleteSuch a beautiful pattern and you explained everthing so well, supported with amazing photos! Thanks. Can't wait to make these!
ReplyDelete