Do the Fan Dance Wrist Cuffs
I've developed a new obsession.
With these gorgeous things. Wristlets, aka, wrist cuffs.
I've also seen them referred to as 'wristers' but that sounds like Emergency room slang the nurses use when they get patients with household objects stuck in strange places.
They're so easy you won't be able to contain yourself.
You'll wonder why you never made these before! You'll make heaps and heaps in all of the colours to wear with all the things to go to all of the places!
Don't be put off by this seemingly loooooooong tutorial. They are actually very quick to make and not too hard. I just always like to include LOTS of photos to show what I'm doing.
Tools of the Trade
3ply crochet cotton
2.5mm crochet hook
2mm crochet hook
Scissors & needle for sewing in your ends
Stitches used are in American Terms
Sl st- slip stitch
Ch- chain
Sc- single crochet
dc- double crochet
The Cuff
To start take your 2.5mm crochet hook and ch 34. (I use a larger hook for the beginning chain
to prevent any tightness as you start to work with the chain.)
Then switch down to a 2mm hook.
Row 1: Dc in the 4th ch from the hook. Dc in each ch across. Ch 3, then turn.
Row 2-22: dc in each dc of the previous row across to the
end. Ch 3, then turn. At the end of the
last row of your cuff, don’t tie off as you will then fold the piece widthways
and slip sitch the 2 ends together to form your cuff.
I have crocheted 22 rows to fit my chubby little wrists, but
please check your measurements and crochet more or less rows accordingly.
 |
| The beginning chain, the dc in the 4th ch from the hook |
 |
| Row 2 of the Cuff |
 |
| Row 8, shut the gate... |
 |
| Row 22, nuthin' left to do! (except sew together then commence the super freaky lacy stuff but let's not focus on that. I'm too busy rhyming.) |
 |
| So did you slip stitch up the 2 ends? Don't forget not to finish off! Then turn and you can start working on the elbow end of your cuff! |
The Subtle Frilly Pretty Bit on the Elbow End
Turn your work 90 degrees so you are now working around the rim of the cuff.
This will be the soft shell edging on the elbow end.
Row 1: Ch1, then work 2 sc in each dc post around. Continue around, then join with a sl st to the beginning ch 1.
See photo below!
Row 2: Ch 3, sk 2 scs, sc in the 3rd sc. Continue around the cuff, joining with a sl st to the first ch of the beginning ch 3.
 |
| Row 2 recap: Ch3, sk 2, sc etc |
Row 3: Sl st into the first Ch3 space. In each ch 3 space: sc, 2 dc, sc. EASY!! Do this in each ch 3 spaces around. Then join the beginning sc with a sl st, finish off and weave in your ends!
 |
| How to make these sweet little shells: first sc in the ch 3 space... |
 |
| Then dc... |
 |
| And another dc... |
 |
| Sorry it's a bit blurry but now do the last sc, and repeat! |
 |
| Told you it was easy!! Looks great. You're doing fab! |
Now for the Fun Part- The Big Frilly Part on the Hand End.
Turn your work now to the other holey end bit where your hand will stick through. Join your crochet cotton on one edge where your joining seam is (so all the beginnings and ending happen in one place).
Row 1: The fan pattern is worked up in a space of 10 stitches. To ensure the pattern works around completely and even with no half fans at the end you may need to add in extra single crochets.
Ch 1 & Sc evenly all the way around the cuff edge. Generally you will work 2 sc per dc post as shown in the photo below. BUT in order to ensure you finish in 10s, you may have to work some extra scs in. This pattern used 22 rows of DCs. Therefore with 2 scs per dc post, I would have ended up with 44scs. I need to have either 40, 50 or 60 scs etc. So I worked in an extra 6 scs evenly around the cuff. Better to increase than decrease as this will give a nice flared out effect.
Row 2: Ch1, sc in same space, then sc in each of the next 4 sc of the previous row, *Ch3, sk 2 stitches, sc, ch 4, sl st back into the same space to create a loop. Ch 3, sk 2 stitches, 5 sc. Repeat from *. Continue to the end, then join with a sl st to the beginning ch1.
 |
| See that cute little loop and the skipped stitches and all that jazz? |
 |
| Now Row 1 is finished! Not much further to go... |
For close up photos, see below...
 |
| So skip the first sc, the 3 scs, skip the last sc. |
 |
| Chain 4, sc to the loop, ch 4 again.... |
 |
| And join back into the loop... |
 |
| After doing this 2 more times you have a little shamrocky thingo! |
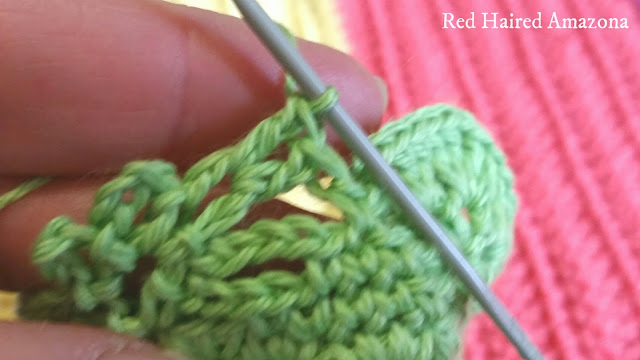
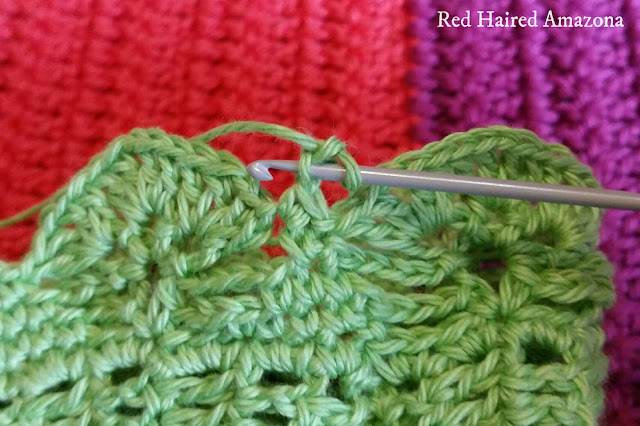
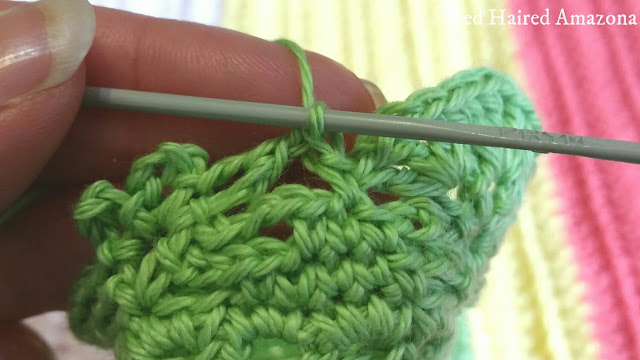
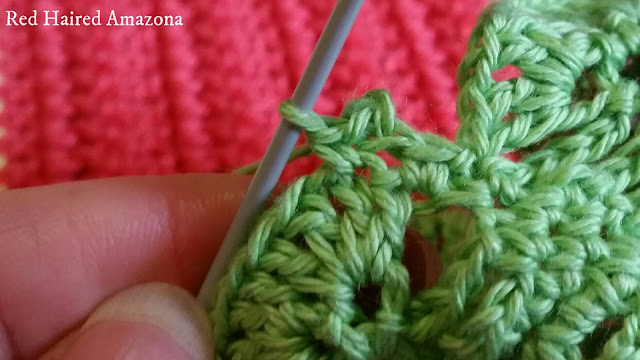
Row 4: Now To begin Row 4, finish Row 3 by joining to the beginning ch 1, then slip st to the middle of the 3 scs, ch 1, then sc in the same space. *Dc over to the first loop in your little shamrock skipping the next sc and all the chains. Dc again into the first shamrock loop, ch 1, then 2 dc into the same shamrock loop. See next 5 photos below for close ups.
 |
| Now To begin Row 4, finish Row 3 by joining to the beginning ch 1, then slip st to the middle of the 3 scs, ch 1, then sc in the same space. |
 |
| From that sc, sk the next sc and chains to dc into the first of the 3 loops. |
 |
| Then dc again |
 |
| Ch 1 then 2 more dcs into the loop (2 dcs, ch 1, 2 dcs) |
 |
| Do the same thing in the other 2 loops as well. |
 |
| Then sc into the middle sc of the 3scs of the previous row to complete this part of the fan! |
 |
| Almost finished! 1 more row to go :) |
sc into the ch1 of the previous row, sc in the next dc, ch 2, sl st in the 2nd chain from the hook, sc in the next 2 dcs,
ch 2, sl st in the 2nd chain from the hook, sc in the next dc and ch 1 space, sc, ch 2, sl st in the 2nd ch from the hook, sc in the next 2dcs, ch 2, sl st in the 2nd ch from the hook, sc in the next dc, sc in the ch 1 sp, sc in the next dc, ch 2, sl st in the 2nd ch from the hook, dc. This completes our micro picots on one fan. Continue from * on all the fans around.
See the next bunch of photos for close up details.
 |
| SC in the first dc |
 |
| Here's where I sl st in the 2nd chain from the hook |
When you get all the way around, sl st into the first sc, then finish off.
Weave in your ends and now make another. That one gloved fashion trend went out in the 1980s, so you will need another cuff!
Then stand back and admire your gorgeous new cuffs! You did good kid!
If you did enjoy my tutorial or any others you've found on my little blog. Many of my tutorials are free for everyone, however if you'd like to make a little donation, it would be gratefully received and contribute towards future free tutorials!


Love all the photos - Kevin has done you proud! Well done you. Summertime in the UK so may have to wait to attempt some!
ReplyDeleteThanks lovely lady! Kevin's doing well, isn't he? Hope you're not sweltering too much in the blistering UK summer heat ;)
DeleteWhat a great -looking fingerless glove pattern! Thanks very much! :)
ReplyDelete_____
Lee Ann
Http://crochetgottaloveit.blogspot.com
Thank you Lee Ann! I'm glad you like it!
DeleteVery elegant.
ReplyDeleteThank you! I was hoping they looked so :)
DeleteOh my, they are very pretty. Thanks for taking the time to do all that tutorial. Will have to put it on my ever expanding to do list.
ReplyDeleteMy pleasure! Thanks for popping by!
DeleteThey look so good but crochet is beyond me I am afraid, a brilliant tutorial and love the scalloped edging
ReplyDeleteThank you Caroline!
DeleteThey are beautiful and such a detailed tutorial, it must have taken you ages.
ReplyDeleteHi Lucy! Yes it did take a little while but probably because I include more detail than necessary? Xox
DeleteThanks for a great tutorial. They look amazing, but I daren't try something addictive I have enough wip'so as it is!! X
ReplyDeleteThanks for a great tutorial. They look amazing, but I daren't try something addictive I have enough wip'so as it is!! X
ReplyDeleteI know what you mean! I had a dedicated Wips month recently to try and clear the decks a little!
DeleteThey're so pretty, I love that green.
ReplyDeleteThank you Anna!
DeleteLove that Edging! And GOOD photos! - Instructive!
ReplyDeleteBut serious, does it *ever* get THAT "COLD" in OZ to really need Cuffs??
#JustSaying
;-D
Ha! When I chat to my friends in England who talk about "heatwaves" at 28c degrees, I scoff at them too! Especially when our heatwaves hit 40+ degrees! Im used to colder weather in Canberra where i need full fat fluffy gloves, but here in Melbourne where it rarely falls below 12c in the day, a wrist cuff is enough. But the locals will be dressed up in almost snow gear declaring it's freezing! And it certainly wouldn’t get anywhere near as cold as what you hearty souls are used to!! Xox
DeleteThese are so pretty, I love the frilly edge. Great clear photo's too, I think the pic with your hand in your jeans pocket shows the cuffs of great. x
ReplyDeleteJan
Those are very attractive with the scalloped edge - good detailed tutorial too, thank you!
ReplyDeleteI found the tutorial hard to follow and there are some missed single crochets in the last row. If there was a clear written pattern it would have been easier.. and btw shamrocks have four loops..
ReplyDelete